Oblique image viewing has changed. Instead of a fixed Screen Layout, you can now pick your Screen Layout and combine a Reference Map with a number of Oblique views to your own choice. The Oblique views are interlinked allowing for synced panning and zooming. And you can also add a view showing other data such as a street level image or a point cloud. The combination is more powerful than before. See About Screen Layout.
You can also choose for a single oblique image view, with a minor Reference Map such as the “Floating Base Map” Screen Layout. The Option menu (central-top of the view) shows the heading of the image, or in other words in which direction you’re looking. In the example below, you’re now looking south.

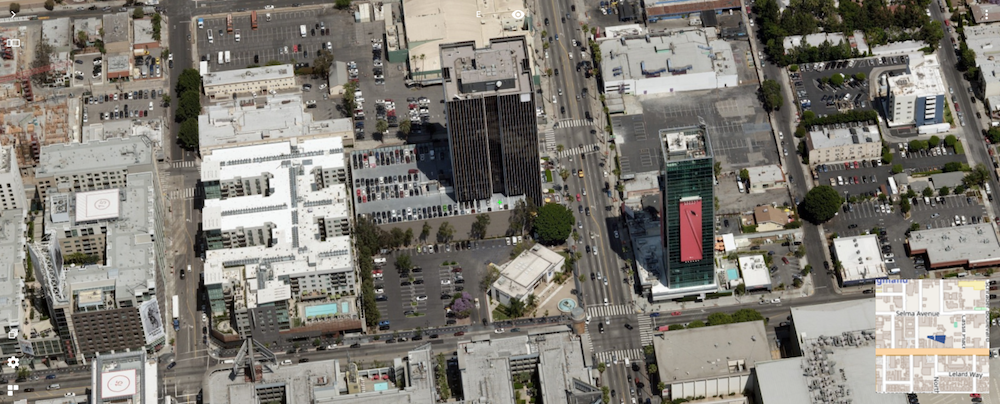
Simply use one of the Rotate menu options to switch your viewing direction. Based on the available oblique camera’s, the next image will be loaded, rotating around the center of the view (check out the small green cross indicating the center of your view – just at the entrance of the large building in the top image). This technique allows to support anything between 1 and 8 oblique camera’s in a single project. Do you know any other software that does this ?
When using a Reference Map, it displays the footprint of the Oblique image on the Map, so you can always reference to what you’re looking. Hover the mouse cursor over the oblique image to see the footprint. Also, when making measurements, these are overlaid on the Reference Map as well as on any other view you have opened. When using multiple oblique views, measurements can jump from one view to another, even jump into the 3D point cloud view, during measurement. This flexibility is unseen in the mapping business. Here’s another screenshot on how 2D, 3D and Oblique is combined. Eat your heart out !
